Super Easy Crochet Tunisian Stitch

Written byAdmin in

Hello, crochet enthusiasts! Today, we’re diving into one of my absolute favorite crochet techniques: the Tunisian crochet stitch. If you’ve never tried it before, don’t worry—this stitch is super easy to learn, and it will open up a whole new world of textured designs for your projects!

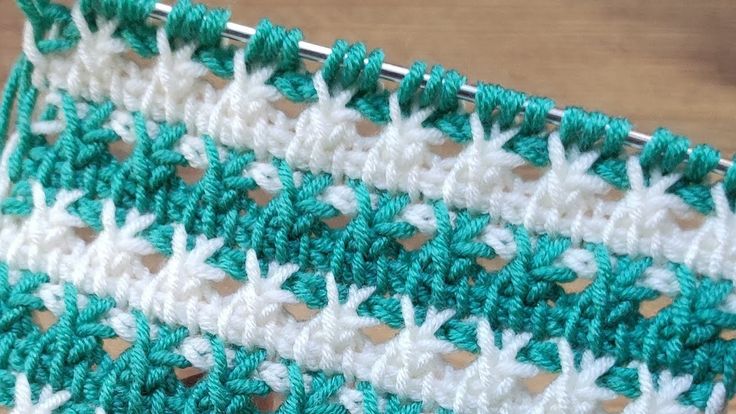
The Tunisian crochet stitch is a combination of knitting and crochet, and it’s often referred to as the “afghan stitch.” It’s perfect for making solid, dense fabrics, like blankets, scarves, and shawls. And the best part? You don’t need to be an expert to get started. In fact, I’m going to walk you through a super easy version of this stitch that anyone can try!

Materials:
2 colors of yarn
3.5 mm Tunisian crochet hook (can also use for blankets)
A stitch marker (optional)

Super Easy Crochet Tunisian Stitch

Super Easy Crochet Tunisian Stitch

Step 1: Create the Foundation Chain
Begin by making a slipknot.
Chain 19 stitches (you can make this longer or shorter based on your desired project size, but always use an odd number of stitches).

Step 2: Creating the Initial Row
For the first row, pick up a loop in each chain stitch.
Make sure your tension is loose to avoid pulling the stitches. Continue across until you have 19 loops on your hook.

Step 3: Starting the Pattern
Close the first two loops together, and then continue by closing two loops together at a time across the row.
Once you reach the end, close the remaining loops, ending with one loop left.

Step 4: Color Change
Change to white yarn. Close the last two loops with the white yarn.
To secure the color change, chain one and pull the yarn to the back.

Step 5: Second Row
Start by pulling up a loop from the next stitch.
Continue with the following steps for each stitch:
Yarn over and pull through the stitch.
Chain 3 and make another loop by pulling through a space behind the stitch.
Continue pulling loops through until the end of the row, and repeat the process for every row after.

Step 6: Closing the Row
When you reach the end of the row, close the first two loops together, chain two, and repeat the closing process for the following loops.
Continue this process across the row until you’ve reached the end.

Step 7: Pattern Continuation
Repeat the same method across each row, using the desired number of stitches.
For the second row, use the white yarn, and for the following rows, continue with alternating colors as desired.

Step 8: Ending the Pattern
Complete the pattern until you’ve reached your desired size.
Make sure to finish with a clean edge and weave in any loose ends.

Final Step: Optional Color Transition
For the final row, you can change colors again if you want a contrasting border or design.
Complete the project with your final stitch adjustments, and your piece is ready to be used for blankets, shawls, or any other creative projects!

Video Tutorial:

Now that you know the basics of the super easy Tunisian crochet stitch, it’s time to grab your hook and yarn and start experimenting! Whether you’re making a blanket, scarf, or cushion, the Tunisian stitch adds a unique texture and flair to any project.

I hope you enjoyed this tutorial and found it helpful. If you have any questions or want to share your Tunisian crochet creations, don’t hesitate to leave a comment below. Happy crocheting, and I can’t wait to see what you create!
You Are Here:

We use cookies to offer you the best experience on our website. By continuing to browse, you confirm that you accept these terms.