Materials:
Scrap or fat quarter for print 1
Scrap or fat quarter for print 2
Scrap or fat quarter for print 3
Scrap or 5/8 yard border print
Fat quarter or 18″ x 21″ backing
18 1/2″ x 14″ rectangle batting
Thread
Template material
Basic sewing tools and supplies
Cutting Instructions for One Place Mat:
Find the templates needed on the provided pattern insert and follow these steps:
Create templates for pieces A, B, C, and D using the patterns included on the insert. For template A, trace the half-pattern onto template material and replicate a second half, aligning them along the vertical centering line. Proceed to cut each piece as directed, focusing on either the horizontal or vertical centering line on the border print to achieve a fussy-cut appearance for the A piece.
Cut two strips measuring 1 1/2″ x 18 1/2″ from print 1.
From print 3, cut two strips measuring 2 1/4″ x 18 1/2″ (labelled as F strips).
Prepare one backing rectangle measuring 18 1/2″ x 14″.
Completing the Quilted Place Mat Top:
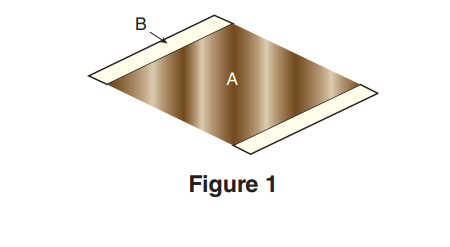
Seam B onto the opposite sides of A, following the guidance in Figure 1. Ensure to press the seams towards B for a neat finish.

Figure 1
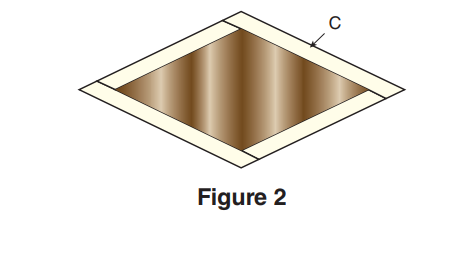
Join C to the remaining sides of A by referring to Figure 2. Press the seams towards C to maintain consistency in the appearance of the piece.

Figure 2
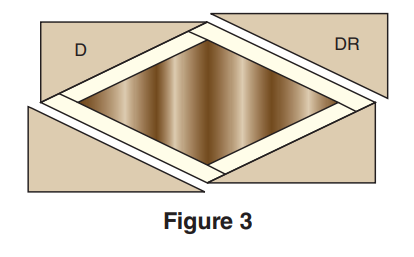
Combine D and DR with the A-B-C unit, completing the central unit as depicted in Figure 3. Press the seams towards D and DR to create a cohesive look.

Figure 3
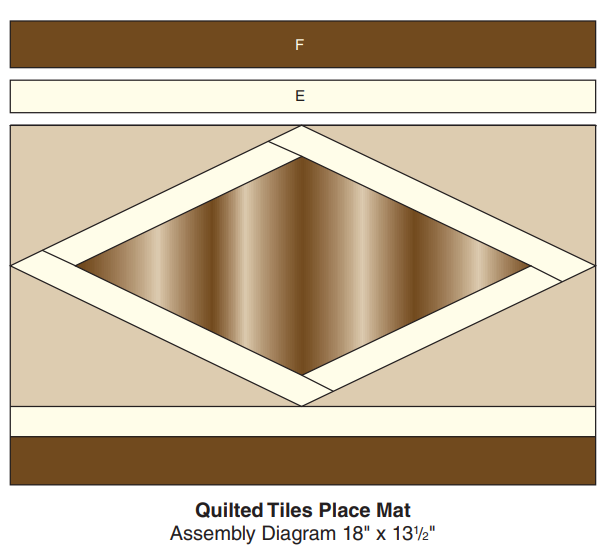
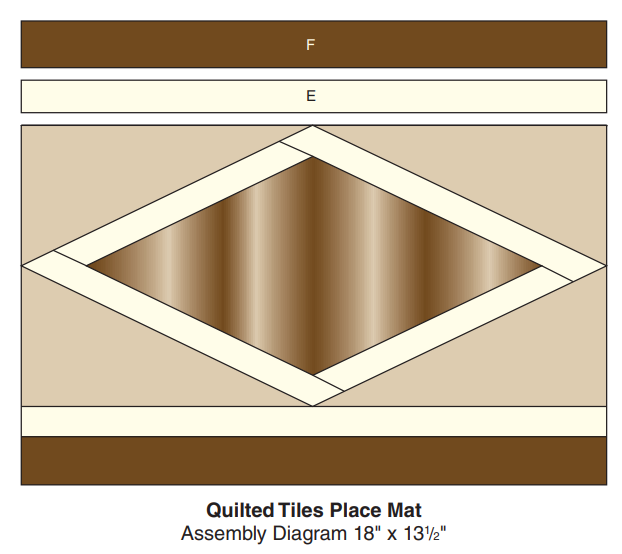
Attach E first, followed by F, to the opposing long sides of the center unit. Use the Assembly Diagram as reference, pressing the seams towards E and then F for a polished appearance.
Completing the Place Mat:
Align the pieced place-mat top, with right sides together, alongside the backing rectangle. Arrange and secure the layered unit on top of the batting rectangle using pins.
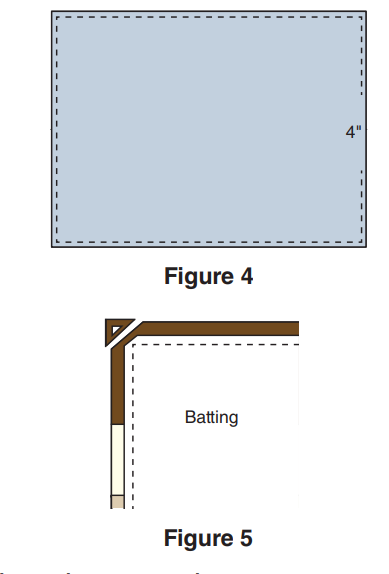
Seam along the edges, encompassing all sides, leaving a 4″ opening on one short end as demonstrated in Figure 4. After stitching, trim the excess batting close to the seam and clip the corners according to Figure 5.

Figure 4, 5
Turn the place mat right side out, gently poking out the corners to ensure they are well-defined. Press the flat edges for a smoother finish.
Fold the seam allowances on the open edge to the inside and hand-stitch the opening closed. Once stitched, press the edges again for a uniform look.
To complete the quilting process, choose between hand or machine quilting methods to add desired patterns or textures to the place mat.
Tip:
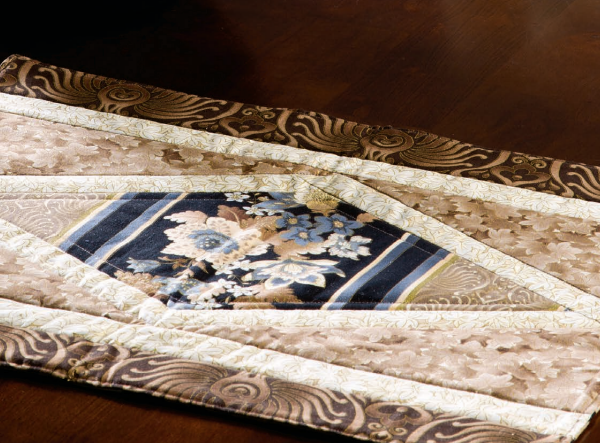
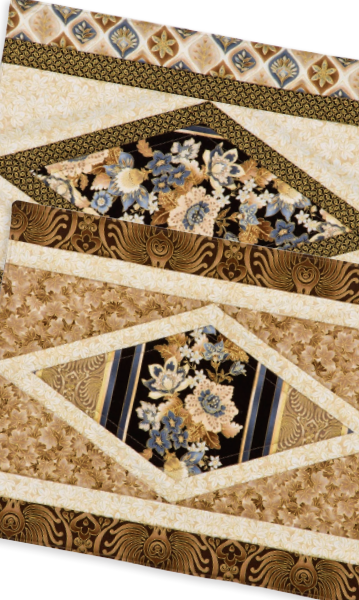
Fussy-cutting fabric empowers you to select specific portions of the fabric for cutting. For instance, one of the sample place mats displays a vertical section of a stripe centered in the A piece, while another version showcases a horizontal part of the stripe in the A piece centered. Utilize the centering lines on the A pattern to align the template either vertically or horizontally on the border stripe for precise placement. The stitched samples illustrate both alignment choices, offering creative possibilities for your design.

Diagram
Quilted Tiles Place Mats are a wonderful way to infuse elegance, charm, and functionality into your dining space. Whether you’re a seasoned quilter or a beginner looking for a creative project, these mats offer a perfect opportunity to explore the world of quilting while adding a personal touch to your home decor.
Explore the myriad of possibilities with quilted place mats and witness how these simple yet stylish additions can transform your dining experience from ordinary to extraordinary.