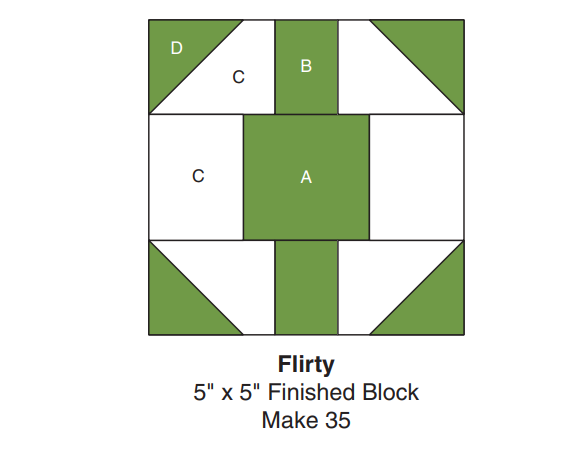
From the white tonal fabric, cut nine strips each measuring 2″ in width across the fabric’s width. Trim six of these strips to produce two strips each measuring 2″ x 37½” labeled as G, 2″ x 30½” labeled as H, and 2″ x 38½” labeled as K. Keep aside the remaining strips for segment J.
Completing the Pieced Center:
Choose a matching set of A, B, and D pieces along with six C rectangles to assemble one Flirty block.
Attach a C rectangle to the opposite sides of A to form the center row, following the guidance in Figure 1. Press the seams towards A.
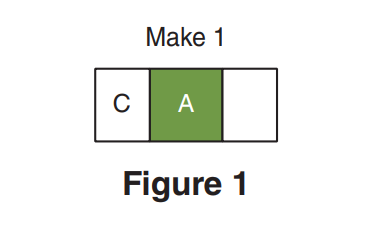
Figure 1
Stitch C rectangles onto the opposite sides of B to create the top row as demonstrated in Figure 2. Repeat this process to craft the bottom row.
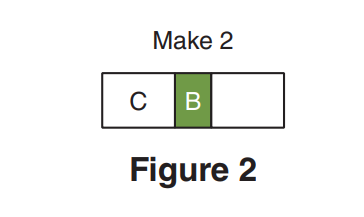
Figure 2
Seam the center row between the top and bottom rows according to the illustration in Figure 3. Press the seams.
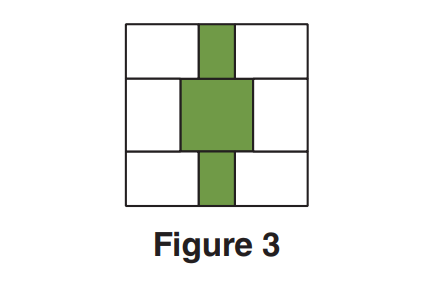
Figure 3
On the wrong side of each D square, draw a diagonal line from one corner to the opposite corner.
Position a D square with its right side facing inward, aligning it with the outer corner of a C piece. Sew along the marked line, following the guide in Figure 4.
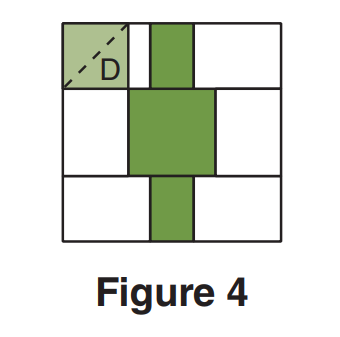
Figure 4
Trim the seam allowance to 1/4″ and press the D piece towards the right side, following the direction in Figure 5.
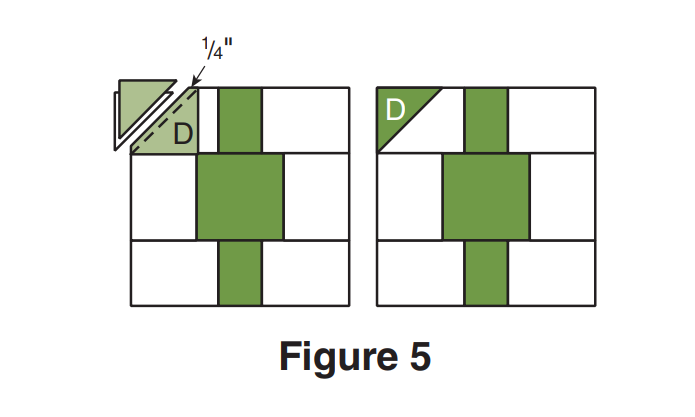
Figure 5
Redo steps 6 and 7 with the remaining D pieces on the remaining corners of C to finish assembling one Flirty block, as illustrated in Figure 6.
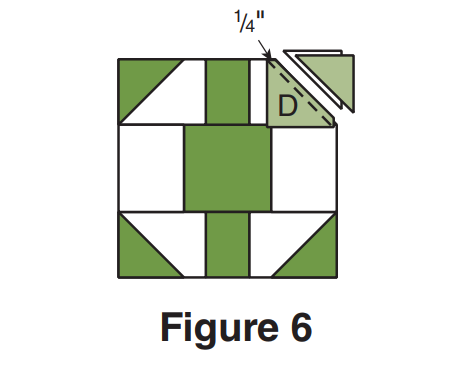
Figure 6
Replicate steps 1 through 8 to create a total of 35 Flirty blocks.
Completing the Quilt Top:
Choose and combine five Flirty blocks to form an X Row, following Figure 7, alternating the orientation of blocks. Repeat this process to create a total of four X Rows. Press the seams away from the second and fourth blocks.
Duplicate the first step to create three Y Rows, referring again to Figure 7. Press the seams toward the second and fourth blocks.
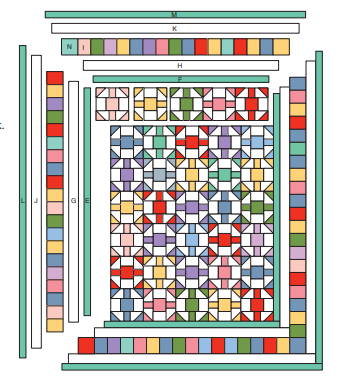
Assemble the X and Y Rows according to the Assembly Diagram to finalize the pieced center. Press the seams consistently in one direction.
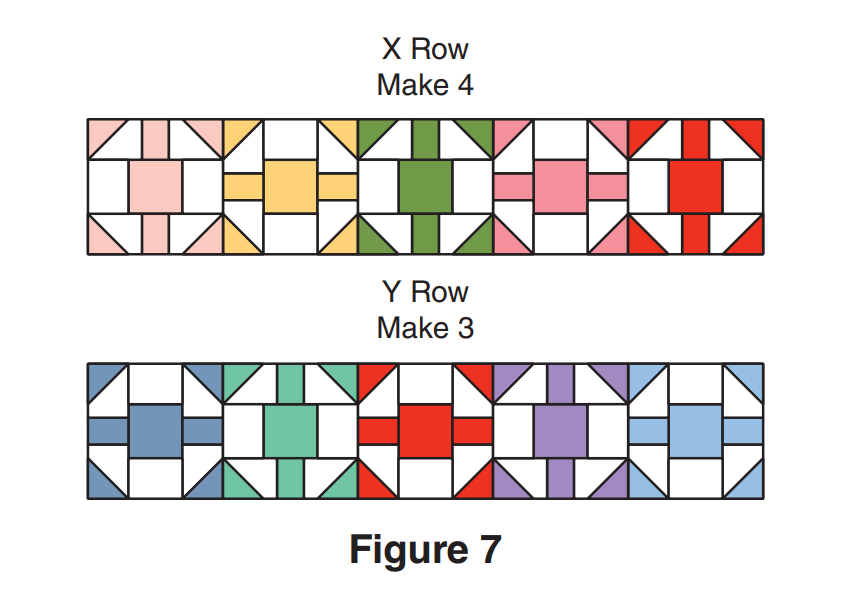
Figure 7
Attach E strips to the opposite long sides and F strips to the top and bottom of the pieced center.
Stitch G strips to the opposite long sides and H strips to the top and bottom of the pieced center. Press the seams towards the strips.
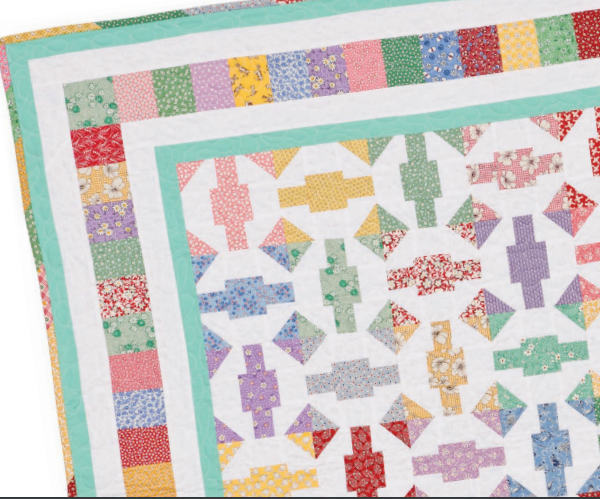
Choose and combine 20 I rectangles along the 3″ sides to create a side strip. Press it accordingly. Repeat to produce a second side strip. Sew these strips to the opposite sides of the pieced center, pressing the seams toward the G strips.
Combine 15 I rectangles along the 3″ sides and add an N square to each end to craft a pieced top strip. Press it accordingly. Repeat the process to make the bottom strip. Sew these strips to the top and bottom of the pieced center, pressing the seams toward the H strips.
Assemble the J strips by joining them at the short ends to form a long strip. Press accordingly. Subdivide this strip into two 2″ x 45½” J strips.
Attach J strips to the opposite long sides and K strips to the top and bottom of the pieced center. Press the seams toward the strips.
Connect the L strips by joining them at the short ends, creating a long strip. Press the strip accordingly. Subdivide this strip into two 1½” x 48½” L strips.
Attach L strips to the opposite long sides and M strips to the top and bottom of the pieced center to finalize the quilt top. Press the seams.

Diagram
Completing the Quilt:
Create a sandwich with the batting placed between the pieced top and a prepared backing piece. Secure the layers together by pinning or basting. Proceed to quilt as desired, whether by hand or machine.
Once quilting is finished, trim the batting and backing fabric to align with the raw edges of the pieced top.
Join the 2¼”-wide binding strips at the short ends using diagonal seams, creating a 200″-long strip. Press the seams open. Fold the strip with wrong sides together along its length, pressing it to form a double-layered binding strip.
Sew the binding to the quilt edges, mitering corners, and overlapping ends. Fold the binding to the backside and stitch it in place to complete the quilt.
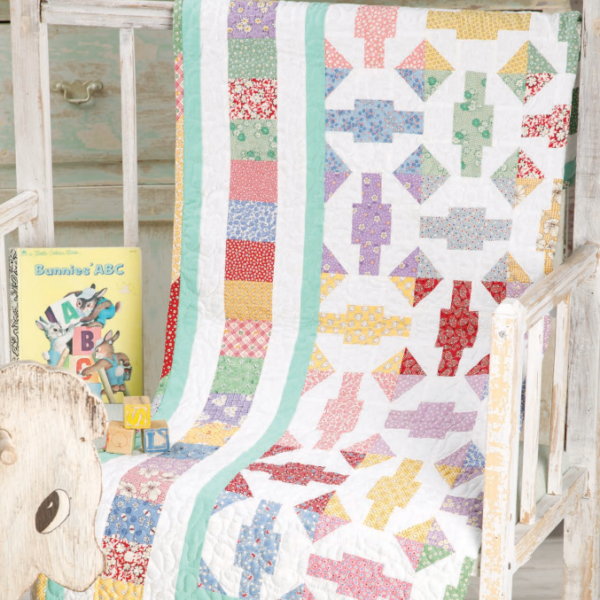
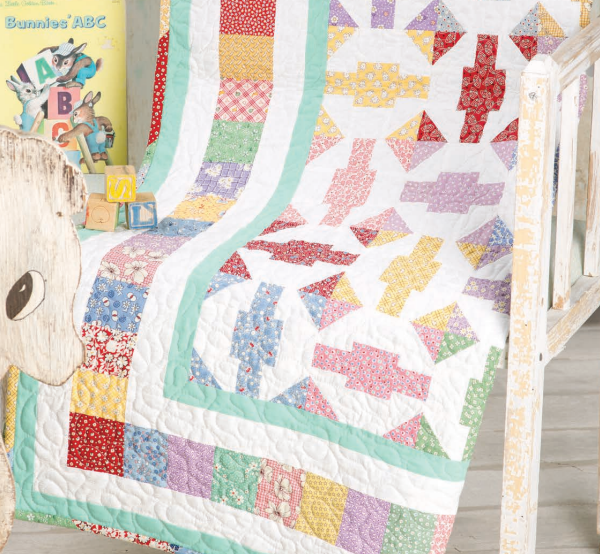
The Flirty ’30s Baby Quilt Pattern, with its easy-to-follow instructions and detailed illustrations, serves as an ideal introduction to quilting for beginners. It allows enthusiasts to delve into the beauty of vintage-inspired designs while creating a timeless piece of comfort and nostalgia.
This project not only offers a delightful quilting experience but also results in a charming baby quilt that will be treasured for years to come. It’s a wonderful way to explore quilting techniques and showcase your creativity through a delightful journey into the past.
